About Me

My photo
WELCOME to my little arty world! Trying to make art is a huge part of my life ... love nothing more than messing around with inks and sprays and generally making a mess!

Wednesday 23 December 2015

WOYWW #342

No workdesk to share as I have cleared everything away in readiness for Christmas but do admit to having serious crafting-withdrawal symptoms!  

Can share, courtesy of the beautiful Julia at The Stamping Ground- host and creator of our special WOYWW times, my cards for this year and a couple of canvasses that were sent and opened early!!!!!

This was the one sent to family & close friends.


Card for our first Great-Nephew, the delightful Henry ... will be nine months old on Christmas Day!


  Card for my husband.


Our main cards for this year and the reason my husband had to Hoover me!  
The moon is mica powder which wafted everywhere and the *S*N*O*W* is Glamour Dust ... need I say more!?!?!?


Two canvasses ... the same, but different!  Photo' taken at the WOYWW Crop 2 BPD at the end of October.  Two of the bestest friends you could ever imagine and I LOVE what they share.
I am in awe of what they give to everyone else and am proud and honoured to call them my friends.


The lady in the photo' is the wonderful Sazz (Sally-Ann Moore) who runs the Clarity East Midlands crafting group in Nottingham.  On her recent wedding day and I was lucky enough to get her as my Secret Santa at the group meet earlier this month.  Alas, me being Santa was not a secret but nobody seemed to mind too much.


These two are now in Australia and were opened on arrival rather than being put under the tree for Christmas morning!!!!!  Very naughty!!!!!


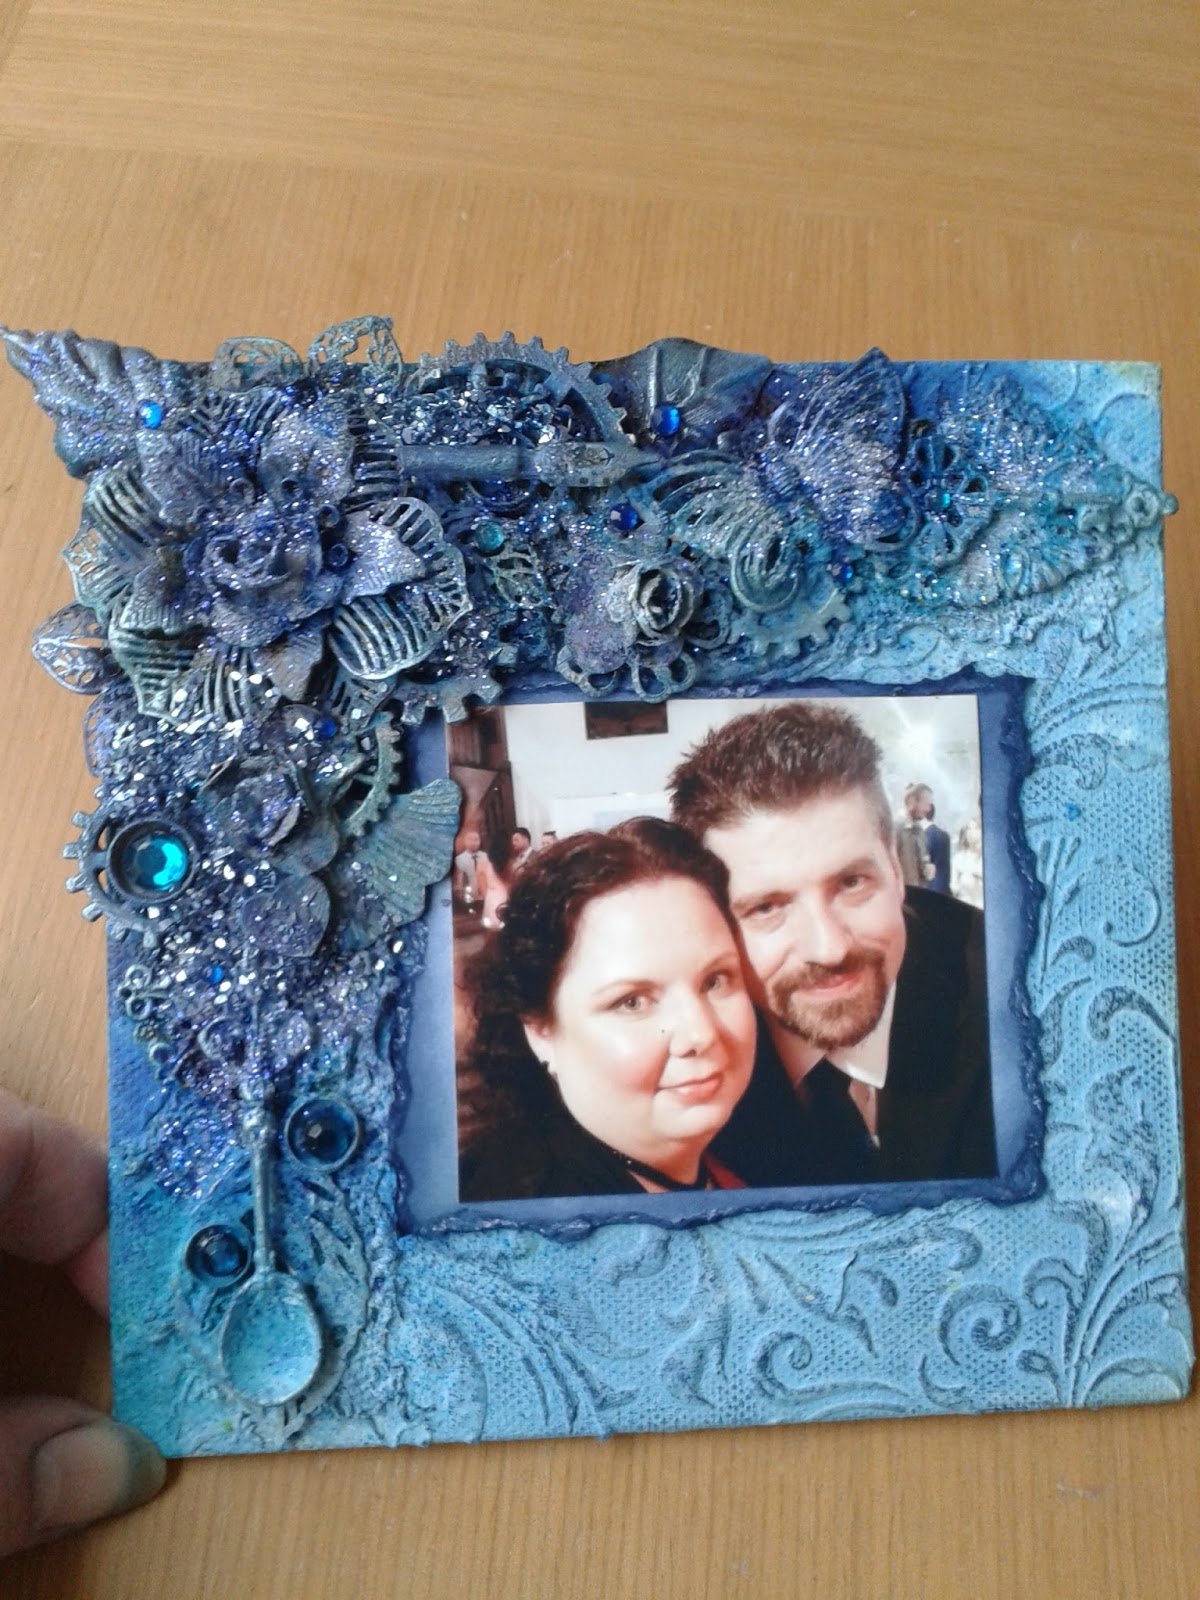
The one above had very much more purple on it than shows here ... it was not nearly as black as it seems! 
One of the best wedding photo's I have ever seen!

Might have to get a little crafting in during the holidays but today need to concentrate on baking mince pies and starting the chocolate mousse - last few cards to hang and then Christmas movies, time to stop and catch my breath and, well, to just chill!

Thanks to each and every one of you for your kindness, support & friendship yet again this year and wishing you nothing but peace & joy, health & happiness and that you all have a
VERY MERRY CHRISTMAS !!!


Wednesday 18 November 2015

WOYWW #337

Not even going down the road as to how long it has been since my last blog!!!! In my defence I did have a wonderful five week holiday in Scotland and a week at the WOYWW Crop 2 BPD in Burbage and time has otherwise just slipped by in a frenzy of crafting!

But back to today and time AT LAST to share with you the craziness that is my workdesk this blustery Wednesday ... for "workdesk" read dining room table as it is far too cold to work out in The Hut (what we call our conservatory) so, for a while, the chaos creeps inside the house.  The delightfully lovely Julia over at The Stamping Ground can far better explain all this WOYWW business so head on over there if you want to find out more and settle down with a cuppa and a slice of something yummy and spend a little time blog-hopping all over the world!

So to my workdesk  dining room table ... probably the last five canvasses of the year and a mad frenzy as they are intended as Christmas gifts!  Hopefully will be finished by bedtime tonight ... hopefully!


All a jumble but a system that kinda, sorta works ... out of shot on the left is a makeshift table on which is heaped yet more "stuff" to wheedle through for the canvasses.  These are at the "they are never going to work" stage but, hopefully, they will come together once I have some colour on them.

Must not forget to drink that cup of tea - green-tea-with-the-bag-in - don't drink nearly enough so must get that one down me!

Can only show sneak peeps as the recipients of these may well see them but those work in progress canvasses in the photo' above will end up looking like these ... at least, that's the plan!!!!!


SO am getting there with all the Christmas crafting ... the 150 Christmas cards are made along with around 20 or so special ones for family etc.,  Got a few wooden hearts finished but need to make more and still got loads of other stuff to get done but keep telling myself I am not stressed at all ... not even a tiny little bit ...BUT Stupid forgot to Keep It Simple AGAIN so it's a good job I quite enjoy the frenzy of this time of year.  Honest I do!

Happy WOYWW'ing!
Happy Crafting!!!!

Saturday 12 September 2015

TUTORIAL : Mixed Media Box

Well I never thought I'd "do a box" but I did and I certainly never EVER thought anyone would want a tutorial on it but so many people asked me to do one after posting it on the Finnabair & Friends - Open Studio Facebook site and also here on my blog I thought I'd better give it a go!

PLEASE bear in mind this is my first time ... I am not saying this is the right way to do it, just MY way of doing it.

If there is too much information then I apologise.
If there is not enough information then I apologise
(if anything is not clear then do please ask ... I am very happy to say how I have done something!)

I am sure there are 101 ways of getting the same results but this method worked for me so here goes ...

Basic box ... this one is about 28x28 cm / 12"x12" square.


Painted it inside and out with Art Basics Heavy Gesso - Black.


Picked my current two favourite stencils to use :
Tim Holtz Layering Stencil - Flourish
Crafter's Workshop Stencil - Live Laugh Love (the small 6" one)


Mask off the parts of the stencil you don't want to use!


I used Art Basics Light Paste - Opaque Matte to apply the design.
I dry each part with my heat-gun as I apply it as I LOVE the way this paste puffs-up with the heat ... make it even more dimensional.


WARNING : next photo' may prove too much for some! 
TOTAL CHAOS as I rummage and sort out bits & bobs to decorate my box. 
I change my mind many times ... it gets stuck on and pulled off and then stuck back on again ... not sure if it is fun or stressful!


But eventually I get something that kinda works.
Or does it?  
I go into meltdown at this point and consider giving up - but come too far now so carry on!

I used Art Basics 3D Gloss Gel - Transparent to stick everything in place.


Doesn't it look truly awful?
Such a mess!
Paint it all black again!


Now comes the part that REALLY freaks me out ... applying colour!
I have no eye for colour.
I dislike pink BUT it kinda worked on the other box so decided to go for it again.  
I still dislike pink.
I spritz & squirt & spray over and over ... drying in between layers.
The colours used here are:
Art Ingredients Mica Powder - Rust (put a little into a spritzer bottle of water)
Ranger Distress Ink - Faded Jeans
Perfect Pearls Mists - Forever Blue / Blue Smoke / Heirloom Gold
Colour Bloom - Pressed Petal (the only pink I like!) / Worn Leather

I built up the colour bit by bit ... if the colour is too much I squirt with water and dab with kitchen paper ... or squirt with water and let it run and drip ... get some amazing effects doing that!

Once the inks have dried I enhance the stencilling and highlight the flowers and cogs and - well, just about everything really with gilding wax, applied with my finger.
Creative Expressions Gilding Wax - Golden Light / Decadent Denim / 
Vintage Plum

Final stage I mixed a little glass glitter with gel and used a paintbrush to apply it to small areas of the lid of the box.
When that was dry I brushed on a little gel into a few places and sprinkled it with fine black glitter.
I dislike glitter BUT totally love the black one used here!

Art Basics Soft Gloss Gel - Transparent
Art Ingredients Glass Glitter - Pitch Black
Art Ingredients Glitter Set - Ebony & Ivory


Final step was to mix a little mica powder with gel and DRY BRUSH it over the box to highlight the details ... pick up a little of the mix of powder & gel and wipe most of it off onto kitchen paper ... you need VERY little on your brush.

Art Basics Soft Gloss Gel - Transparent
Art Ingredients Mica Powder - Copper

And when all that has been done you end up with a very different box to one with which you started!


Front 


Two sides


Back


Close up of the details


I hope this inspires even one person to have a go ... will have made the stress of doing my first ever tutorial worthwhile!

Thursday 10 September 2015

I did a box!

Well, never say never!
I did say I'd never get into altering boxes but caved in and Had A Go.

My friend fell in love with a very beautiful painted box and I so, so, so wanted to get it for her.  Alas, it needed to come from America and just proved too expensive for me to treat her to it.  There is no way I could dream of producing anything like the box she fell in love with as I can't draw even a wonky line, let alone a straight one and can't paint to save my life. 

But I thought I could make her one in a similar way to my canvasses and decided to give it a try.

I have been asked to do a tutorial on what I did and I have another box so will make another one and take photo's at each stage as I go along, but for now, I just wanted to get this one on my blog (I like to keep my blog as a kind of crafting diary) but I will get the other one on here, with instructions, just as soon as I can.


Front


Sides


Back


The colours don't really look right on these photo's ... they were not bright but more blue, pink & gold than show up here. I lined the inside with black felt but forgot to take photo's!  

Sent it to my friend in Scotland earlier this week and this is the photo' she took which shows the colours a little better.


So my first ever box and something I may well do again.
Maybe.

Wednesday 26 August 2015

WOYWW 325

Don't be silly of course it isn't Wednesday again!!!!  
All this What's On Your Workdesk malarky sure does make the weeks seem to fly by ... especially when you realise it has been TWO weeks since you last desk-hopped, all courtesy of the beautiful lady, Julia, our leader and enabler over at The Stamping Ground  
SO here it is ... my desk at this particular moment in time ... trying to make three canvas things that will be gifts but time will tell if they are good enough to actually hand over when finished!


I know, I know ... pretty grim, isn't it!?!?!?!?
Having a good old rummage through all my bits and bobs "Finnabair" inspired boxes ... can just about see three new Distress Ink pads and five new sprays lurking behind my heatgun.  The rest is just a mad frenzy I'm afraid.

Short and sweet this week ... too much to do ... not enough hours!
Happy WOYWW'ing fellow crafters!!!


Sunday 23 August 2015

Claritystamp Challenge #30 - Bingo!


A theme from Clarity I had not come across before ... the idea is you take any one line from the Bingo grid and use those products ... 


              Of course it was the middle, horizontal line that SCREAMED to me !!!


Items used were all Clarity (apart from the string!)
Ocean Swirl stencil
Leafy Swirl stamp
Lacy Swallows stamps
Large & Small butterfly stamps
The Simple Things verse stamp
***
Black card
Grunge paste
Black heavy gesso
Gold embossing powder
Gold gilding wax
***
more spray inks than I can remember but somewhere along the lines of:
Perfect Pearls Mists : Cappucino, Perfect Copper, Heirloom Gold, Forever Blue
Colour Bloom : Pressed Petal
and something in an unmarked spritzer bottle that I would have mixed myself ... might be Rust Mica powder & gin!