About Me

My photo
WELCOME to my little arty world! Trying to make art is a huge part of my life ... love nothing more than messing around with inks and sprays and generally making a mess!

Saturday, 12 September 2015

TUTORIAL : Mixed Media Box

Well I never thought I'd "do a box" but I did and I certainly never EVER thought anyone would want a tutorial on it but so many people asked me to do one after posting it on the Finnabair & Friends - Open Studio Facebook site and also here on my blog I thought I'd better give it a go!

PLEASE bear in mind this is my first time ... I am not saying this is the right way to do it, just MY way of doing it.

If there is too much information then I apologise.
If there is not enough information then I apologise
(if anything is not clear then do please ask ... I am very happy to say how I have done something!)

I am sure there are 101 ways of getting the same results but this method worked for me so here goes ...

Basic box ... this one is about 28x28 cm / 12"x12" square.


Painted it inside and out with Art Basics Heavy Gesso - Black.


Picked my current two favourite stencils to use :
Tim Holtz Layering Stencil - Flourish
Crafter's Workshop Stencil - Live Laugh Love (the small 6" one)


Mask off the parts of the stencil you don't want to use!


I used Art Basics Light Paste - Opaque Matte to apply the design.
I dry each part with my heat-gun as I apply it as I LOVE the way this paste puffs-up with the heat ... make it even more dimensional.


WARNING : next photo' may prove too much for some! 
TOTAL CHAOS as I rummage and sort out bits & bobs to decorate my box. 
I change my mind many times ... it gets stuck on and pulled off and then stuck back on again ... not sure if it is fun or stressful!


But eventually I get something that kinda works.
Or does it?  
I go into meltdown at this point and consider giving up - but come too far now so carry on!

I used Art Basics 3D Gloss Gel - Transparent to stick everything in place.


Doesn't it look truly awful?
Such a mess!
Paint it all black again!


Now comes the part that REALLY freaks me out ... applying colour!
I have no eye for colour.
I dislike pink BUT it kinda worked on the other box so decided to go for it again.  
I still dislike pink.
I spritz & squirt & spray over and over ... drying in between layers.
The colours used here are:
Art Ingredients Mica Powder - Rust (put a little into a spritzer bottle of water)
Ranger Distress Ink - Faded Jeans
Perfect Pearls Mists - Forever Blue / Blue Smoke / Heirloom Gold
Colour Bloom - Pressed Petal (the only pink I like!) / Worn Leather

I built up the colour bit by bit ... if the colour is too much I squirt with water and dab with kitchen paper ... or squirt with water and let it run and drip ... get some amazing effects doing that!

Once the inks have dried I enhance the stencilling and highlight the flowers and cogs and - well, just about everything really with gilding wax, applied with my finger.
Creative Expressions Gilding Wax - Golden Light / Decadent Denim / 
Vintage Plum

Final stage I mixed a little glass glitter with gel and used a paintbrush to apply it to small areas of the lid of the box.
When that was dry I brushed on a little gel into a few places and sprinkled it with fine black glitter.
I dislike glitter BUT totally love the black one used here!

Art Basics Soft Gloss Gel - Transparent
Art Ingredients Glass Glitter - Pitch Black
Art Ingredients Glitter Set - Ebony & Ivory


Final step was to mix a little mica powder with gel and DRY BRUSH it over the box to highlight the details ... pick up a little of the mix of powder & gel and wipe most of it off onto kitchen paper ... you need VERY little on your brush.

Art Basics Soft Gloss Gel - Transparent
Art Ingredients Mica Powder - Copper

And when all that has been done you end up with a very different box to one with which you started!


Front 


Two sides


Back


Close up of the details


I hope this inspires even one person to have a go ... will have made the stress of doing my first ever tutorial worthwhile!

Thursday, 10 September 2015

I did a box!

Well, never say never!
I did say I'd never get into altering boxes but caved in and Had A Go.

My friend fell in love with a very beautiful painted box and I so, so, so wanted to get it for her.  Alas, it needed to come from America and just proved too expensive for me to treat her to it.  There is no way I could dream of producing anything like the box she fell in love with as I can't draw even a wonky line, let alone a straight one and can't paint to save my life. 

But I thought I could make her one in a similar way to my canvasses and decided to give it a try.

I have been asked to do a tutorial on what I did and I have another box so will make another one and take photo's at each stage as I go along, but for now, I just wanted to get this one on my blog (I like to keep my blog as a kind of crafting diary) but I will get the other one on here, with instructions, just as soon as I can.


Front


Sides


Back


The colours don't really look right on these photo's ... they were not bright but more blue, pink & gold than show up here. I lined the inside with black felt but forgot to take photo's!  

Sent it to my friend in Scotland earlier this week and this is the photo' she took which shows the colours a little better.


So my first ever box and something I may well do again.
Maybe.

Wednesday, 26 August 2015

WOYWW 325

Don't be silly of course it isn't Wednesday again!!!!  
All this What's On Your Workdesk malarky sure does make the weeks seem to fly by ... especially when you realise it has been TWO weeks since you last desk-hopped, all courtesy of the beautiful lady, Julia, our leader and enabler over at The Stamping Ground  
SO here it is ... my desk at this particular moment in time ... trying to make three canvas things that will be gifts but time will tell if they are good enough to actually hand over when finished!


I know, I know ... pretty grim, isn't it!?!?!?!?
Having a good old rummage through all my bits and bobs "Finnabair" inspired boxes ... can just about see three new Distress Ink pads and five new sprays lurking behind my heatgun.  The rest is just a mad frenzy I'm afraid.

Short and sweet this week ... too much to do ... not enough hours!
Happy WOYWW'ing fellow crafters!!!


Sunday, 23 August 2015

Claritystamp Challenge #30 - Bingo!


A theme from Clarity I had not come across before ... the idea is you take any one line from the Bingo grid and use those products ... 


              Of course it was the middle, horizontal line that SCREAMED to me !!!


Items used were all Clarity (apart from the string!)
Ocean Swirl stencil
Leafy Swirl stamp
Lacy Swallows stamps
Large & Small butterfly stamps
The Simple Things verse stamp
***
Black card
Grunge paste
Black heavy gesso
Gold embossing powder
Gold gilding wax
***
more spray inks than I can remember but somewhere along the lines of:
Perfect Pearls Mists : Cappucino, Perfect Copper, Heirloom Gold, Forever Blue
Colour Bloom : Pressed Petal
and something in an unmarked spritzer bottle that I would have mixed myself ... might be Rust Mica powder & gin!


Wednesday, 5 August 2015

WOYWW # 322

Ok so the idea is we share our workdesks to give fellow crafty bloggers from all around the world the chance to pop in and take a peek and we get to have a good old nosey too. 
Now my workdesk is normally pretty chaotic ... a sort of organised chaos that works for me despite my desires to stop and tidy it every five minutes.  It only takes one minute to return it to chaos so that is four minutes I could be crafting so am learning to Let It Go and just have a good tidy up at the end.
But for the purposes of WOYWW today here it is in all its chaotic glory ... 


Pretty scary right?!?!?!?!?

From all of that came two projects this week  : colours much more vibrant than appear here.


So Happy WOYWW'ing and if you want to see more head over to The Stamping Ground where there will be plenty more creative spaces to visit!

Saturday, 18 July 2015

Clarity Challenge #29 - Anything Goes!

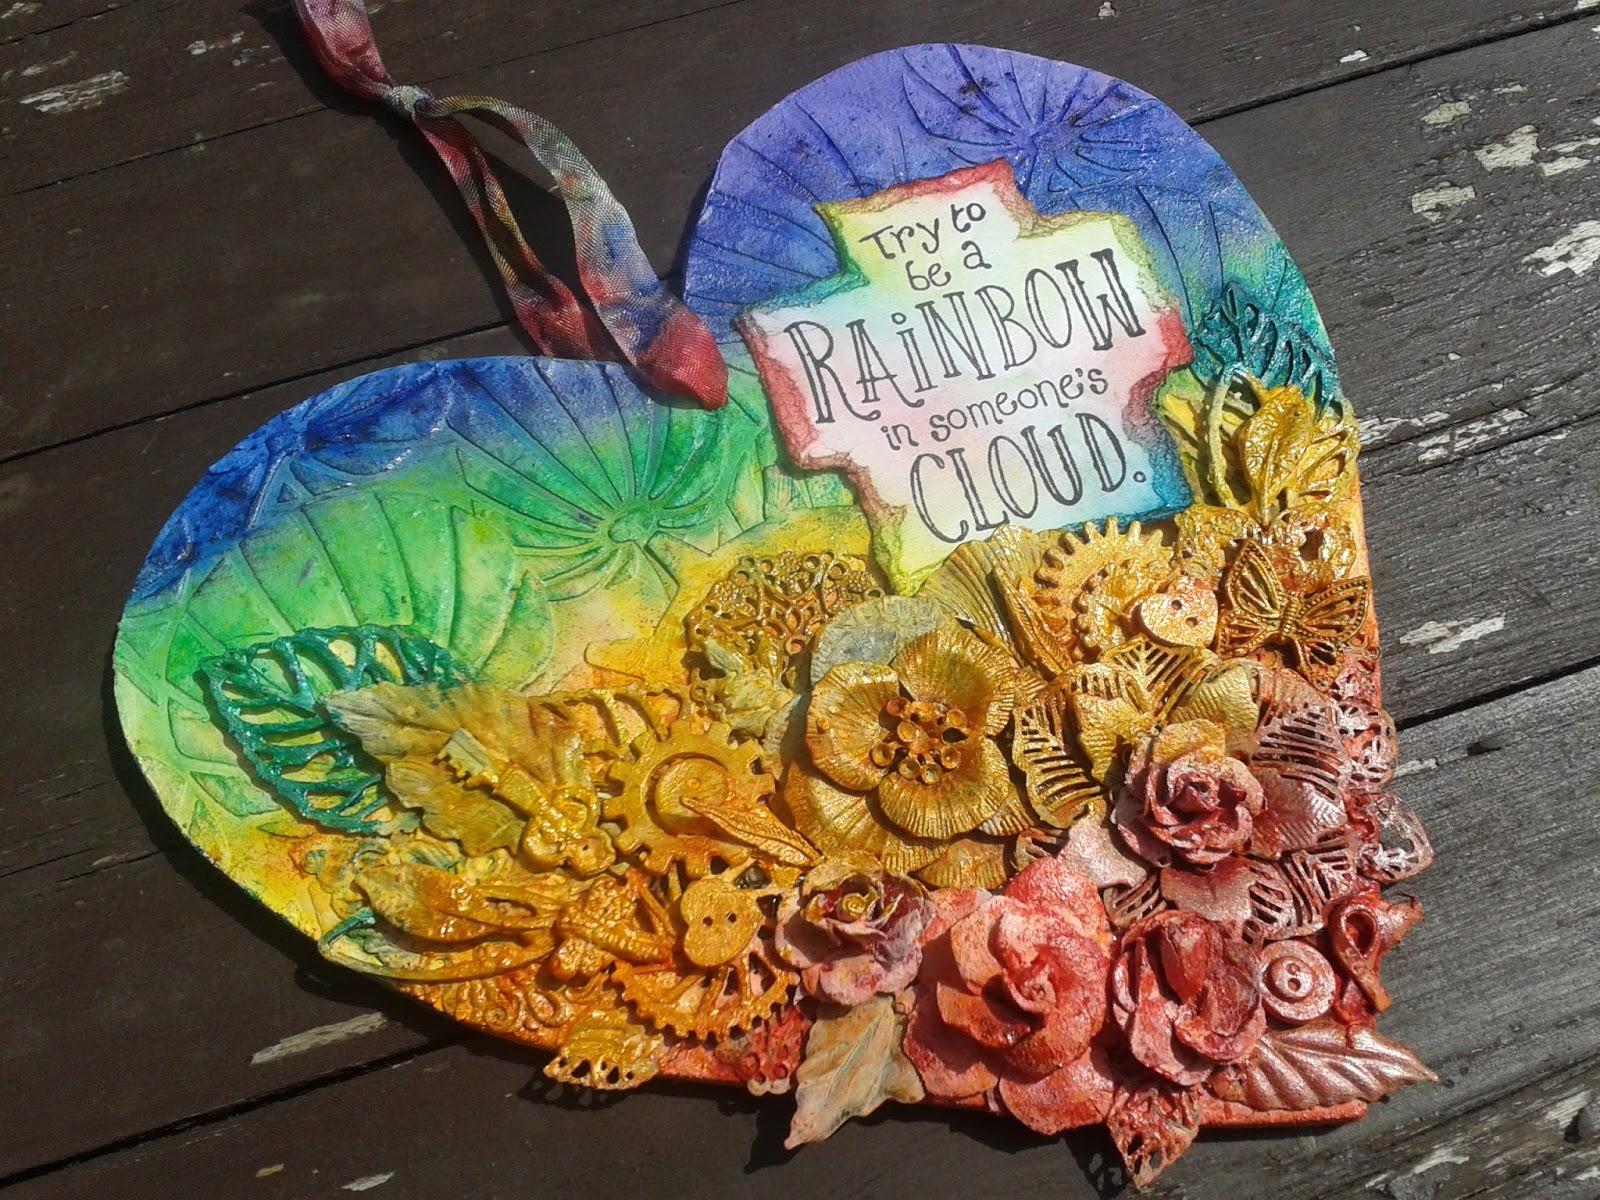
Had a little flash of inspiration when this month's challenge over at Clarity Towers was announced and I worked on a similar heart yesterday so decided to move WAY out of my comfort zone and embrace brighter & more vibrant colours.
HATE them so will be heading back to the tones I much prefer but, waste-not-want-not & I thought I may as well enter it anyway.
I knew I wanted to use one of my favourite quotes from Clarity and the lovely Chinese Lanterns stencil - all the colour was applied using Brushos  
 but otherwise just bits'n'bobs from my, er, bits'n'bobs box!


Thursday, 2 July 2015

Getting it wrong

This is one of those projects that, no matter how much I tweaked it, I couldn't get it anywhere near close to what I wanted.  Nobody who has seen it really liked it despite their polite comments ... and some not so polite as I'd rather they be honest and not say they like it when they don't.  Gave it as a present but will have to chalk it up to the learning curve and either not go down this route again EVER or try again and hope to Do Better next time.

My eldest nephew turned 30 last week and his girlfriend is celebrating her 21st today so I thought I'd make them "matching but different" canvasses ... not my best idea as my canvasses are not to everyone's taste and I think I should stick to regular gifts like socks or chocolates in future.

The Roman numerals represent their ages but that's as themed as they got ... oh on nephews canvas is a tiny garden rake and three little feet as he is a podiatrist who likes to do gardening ... at least there were three feet but now there seems to be only two - one must have fallen off when I tipped off the millions and millions of micro-beads that missed the glue into the rubbish bin!


This little canvas I made for my friend's birthday and the photo' is of her daughters.  
Not often - if ever - I say this but I was ok with how this one turned out.
The colours are much more vibrant than they show up here and I had a mini-breakdown when the top left hand edge turned out way, way too pink but after living with it for a while I came to even like that bit!


Wednesday, 17 June 2015

Wednesday again ... WOYWW 315

Haven't really got time to blog today so this will be short and sweet whilst my Gesso is drying!  

Desk as left it last night except for the pot of Gesso and freshly painted mini-canvas all ready to spritz and splatter and mist and sprinkle with colour ... the scary part I find where I still have to take a deep breath before taking that first squirt!


Box on the right is all ready and waiting to be sent off with a canvas in it ... hesitating to actually get it in the post as all sorts of negativity and worry flood my tiny wee brain ... 'twas a commissioned piece you see so all the "what if's" come into play ... it WILL be in the post today though so I shall have to practise Calming Thoughts until I hear back that it is ok.  SOoooo stressful.

Well, that Gesso looks dry to me so off to spritz and squirt ...
as you do on a Wednesday morning.

Happy WOYWW'ing fellow bloggers - and if you want to know what it is all about or take a peep into the wonderful world of us crafty bloggers then head to The Stamping Ground where all is made very clear.


Wednesday, 10 June 2015

Clearly Overwhelmed

One last post for today ... simply got to get this one down in the history books.

Won't repeat the info., given in a previous post but was SOMEHOW chosen as a Top Five for the Clocks challenge at Clarity ... was somewhat overwhelmed and so, so grateful for this as, whilst it was not a sad piece of work to produce, it totally represents the last nine years of my life and I could not have done anything differently with this project.  

Getting Top Five kinda, sorta brings me full circle ... can't quite explain what I mean but to put your entire heart and soul into a project and then have it recognised - well, it just blew me away.

Thank you Clarity Challenge Team!


Caravan Crafting

A first for me -  well, have knitted, crocheted or cross-stitched in the caravan for years and years of course but never thrown in my tote-bag-on-wheels-with-its-matching-tabletop-tote-bag-thingy before but needs must!

Heading off for the ALRC National Land Rover Rally (which our club, the MROC was hosting this year) but with a trip to the WOYWW crop down in Burbage and then up to attend the Finnabair workshops in Harrogate meant I needed to take stuff with me.

Proved useful as hubby was off helping prepare the site for the rally ... over 400 caravans can't just turn up without a little preparation you know ... so he erected signs and roped off this area and that area and generally ran around like a headless chicken and I sat all calm and collected, in my caravan, crafting.  Bliss!

So, roughly in chronological order ...  you take along whatever you fancy to work on to the crop so decided on a canvas.  A very new concept for me but am loving it ... have yet to really be pleased with any of my results but am not admitting defeat yet and Will Persevere!


I made a few wooden hearts too ... I do love making these.
Experimented with a different format but do not like it at all - might be the colours putting me off but am rethinking this design and will stick to my grunge-pasted efforts rather than plonking on a huge flutterby me thinks.

The first two are now stuffed in the cupboard probably never to see the light of day again ... but I might see if I can tweak them at some point.


This one I did as a gift to say thank you to one of our Land Rover friends.  Our 'fridge in the caravan decided to challenge us by not working (had just been shopping too so fifty quids worth of stuff ended up in the skip!!!) - anyway, word got around we were struggling and then appeared our friend with their cool box - and she came each morning with fresh ice packs she had frozen in her caravan for us and swapped them over ... couldn't have managed without that help! 


The husband of another Land Rover friend now caravans on his own as his wife has Alzheimers and - well, it is just desperately sad and cruel.  Jaquee was a joyous and bubbly loud lady whom was adored and is very much missed.  I chose bright and cheerful colours and asked Rob to take this to her - she no longer really remembers who any of us are but I certainly know who she is and she was one of life's special people who filled you with joy just by being with them.  


And then back to my preferred waxed and polished grunge paste in subtle muted tones ... this one made for a friend I was meeting at the Finnabair workshops and as a thank you to her for the endless questions leading up to the event.


Needed to make a "With Regret" but wanted something different so used my much loved Tim Holtz big butterfly to make a garland.
Oh yes, have also discovered Brushos ... all Maggie's (Silvercrafter) fault but I experimented and discovered you can dye your ribbon with them and I LOVED the effect so can't wait to make more of these.


Getting  a bit picture heavy so might blog the rest later ... it's a busy life being a crafter!

WOYWW 314

Well I did see the surface of the table for all of, ooooh, three minutes - ok, partial surface of the table but a clear table is not a crafty table so I actually prefer this view.

Complete and utter chaos which surprises me as I really do not like working in such a mess and goodness only knows how it happens ... but happen it does ... regularly, so just better to work with it than not work at all.

This photo' is to the right ... see even having to dry the latest grunge-pasted wooden heart on top of my glass of water as there was no room elsewhere!


Second photo' is directly in front of me ... more drying on my cup of tea this time.


And to the left .. like I said - crafting on the edge.
On the edge of a whirlwind where, amongst the chaos and carnage I can just about manage to find what I need!
Sometimes.


Hoping to blog other projects and stuff later but have had commissions to make two wooden hearts and a canvas so, er ...
DO NOT DISTURB
ARTIST IN RESIDENCE

(and yes, I am most definitely taking the P out of myself here folks!!!)

Happy WOYWW'ing fellow crafty bloggers!
(Wednesday again you see and a little blog-hopping to see the wonderful workspaces of crafty friends courtesy of our amazing, beautiful, much loved host Julia over at The Stamping Ground

Wednesday, 27 May 2015

WOYWW 312 ... the 6th Anniversary edition!!!!

HAPPY 6TH ANNIVERSARY FELLOW WOYWW'ers!!!!!!

Ok got to admit to writing this way ahead of The Event but will be away in the caravan with no internet or phone signal when the ATC swap takes place but did so still want to join in so, with the help of my dear friend MaggieC (Silvercrafter) I am doing a scheduled blog ... never done it before so will have to Watch This Space to see if all goes to plan.

Will be sure to blog about the ATC swap just as soon as I can when I get home again but will be keeping an ATC back from the WOYWW crop to send to the person next to me in the linky list!

So, for now, HUGE congratulations to Julia over at The Stamping Ground for reaching her 6 year milestone of WOYWW'ing ... she alone is responsible for new friendships being forged far and wide and for the love, encouragement and support we crafty bloggers give to each other.

You are one of life's special people Julia ... THANK YOU!!!!!

xXx

OK, folks, it is Maggie here finishing off for Debbie.  She has given me permission to tweak this post for her and add her photos, so here goes.  I am sure you will recognise Debbie's beautiful work in these two pictures.  


She is probably going to kill me for this, but, hey, she cannot get hold of me at the moment.  You can see what a talented lady she is from these fabulous ATCs and the tags.  I would not have a clue on how to put these works of art together, but it is second nature to our Debbie.


I wish I had taken some photos on Monday of the lovely things she has made while away in the caravan - absolutely stunning, glorious colouring and design.

Right, I think I had better finish now, otherwise I will be in even more trouble.  So, it is time you went back to Julia to add your congratulations for her great achievement.

Happy 6th Birthday. 

PS Debbie, if you do manage to get into this post  and alter it, I will just change it back again.